If you have not already installed Liferay IDE view Liferay IDE Installation Guide for a detailed walk-through of installation.
· 1. Liferay Portal 6.0 (RC2 or greater) downloaded and installed (or download in the IDE itself)
· 2. Liferay Plug-ins SDK 6.0 (RC2 or greater) downloaded and installed (or download in the IDE itself)
· 3. Eclipse Helios/Galileo Java EE for developers package - see the Liferay IDE Installation Guide for more information.
Note: earlier versions of Liferay, e.g. 5.x, are not supported yet by the Liferay IDE
Before you can begin creating new Liferay plug-in projects, a Liferay Plug-ins SDK and Liferay Portal must be installed and configured in the IDE.
· 1. Open Eclipse with Liferay IDE installed.
· 2. Open Preference page for Liferay > Installed SDKs ( Go to Window > Preferences > Liferay > Installed SDKs )
 |
· 3. If you have not already downloaded the Liferay Plug-ins SDK for your portal version you can download it from the sourceforge.net Liferay downloads page. Look for liferay-plugins-sdk-6.0.2.zip.
· 3a. An alternative to downloading yourself is using the "Download..." button on the Installed SDK page and it will automatically download and install the latest Liferay Plug-ins SDK for you.
 |
· 4. If you did the "Download" option you can skip this step, if not, you will need to add your SDK using the Add button which brings up the Add SDK Dialog:
 |
· 5. Browse to the location of your Plug-ins SDK installation.
· 6. The default name is the name of the directory but you can change it if you wish.
· 7. Select OK and you should see your SDK in the list of Installed SDKs.
 |
Note: multiple SDKs can be added to the preferences but you will need to select at least one SDK to be the default which is represented by the SDK that has the checkbox selected.
Note: if you have version 6.0.4 of Liferay Portal and the Plugin SDK, you will need to change your build.properties file. The SDK plugin assumes you have installed the SDK at the same level (same directory) as the portal directory. In the line *app.server.dir=${project.dir}/../bundles/app_server_name of build.properties you have to change bundles with the name of the Liferay portal installation directory e.g. liferay-portal-6.0.4.
Otherwise, portlets created with the SDK plugin will not be deployed by Ant.
· 1. In eclipse open the Runtime environments preference page (Go to Window > Preferences > Server > Runtime environments)
 |
· 2. Click Add to add a new Liferay runtime and find Liferay v6 Tomcat under the Liferay, Inc. category and click Next.
 |
· 3. If you have not already downloaded and installed a copy of the Liferay Portal Tomcat bundle then you can download the latest Liferay Portal Tomcat bundle by clicking the "Download and Install..." button within the wizard.
 |
· 4. If you used the download option you can skip this step, if not, click Browse and select the location of the liferay-portal-6.0.2 directory.
 |
· 5. Once you have selected the Liferay portal directory if it has a bundled JRE then that bundled JRE will be automatically selected as the JRE to use for launching the server. However, if there is no bundled JRE (Mac and Linux users) then you will need to select the JRE to use for launch.
 |
· 6. Click finish and you should see the Liferay portal runtime in the list of runtimes in the preference page.
 |
· 7. Click OK to save the runtime preferences.
· 8. If you didn't choose to create a server you will need to create one from the servers view before you can test the server.
· 9. Find the Liferay, Inc category and select the Liferay v6 Server and choose the Liferay v6 Runtime that you had previously created.
  |
This step is not necessary for Liferay IDE 1.5 and greater, see http://issues.liferay.com/browse/IDE-287
This steps are not necessary if Liferay is installed on an OS whose encoding is latin1 or UTF-8 (most US and European OS). Otherwise, it is necessary to specify the console encoding to properly display console messages.
· 1. Select "Run" - "Run Configuration..." from the Eclipse menu.
· 2. Select "Liferay v6.0 Server" from the menu.
· 3. Select the "Common" tab.
· 4. In the encoding section, select "Other" and "UTF-8". Select "Apply" - "Close".
· 1. Go to the servers view and you should see the new server that was created. right click and choose "Start" or "Debug"
 |
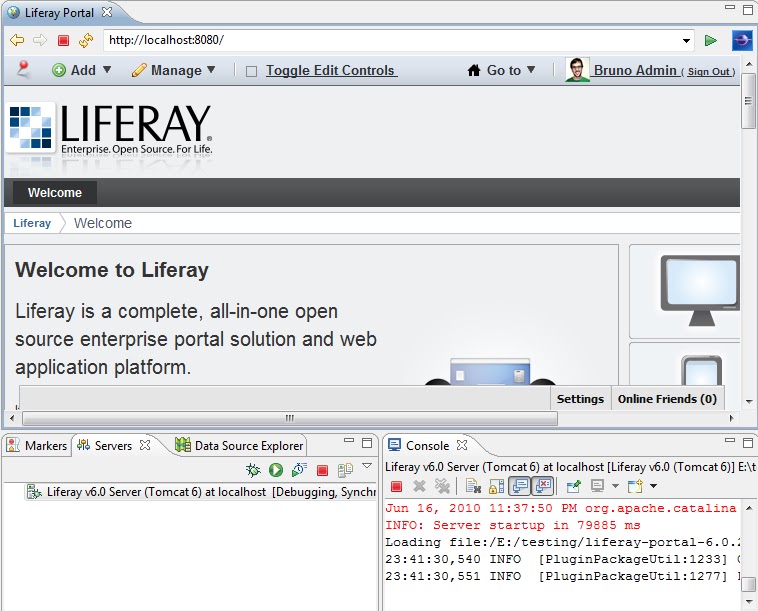
· 2. You should see messages appear in the Console view and once it starts, the servers view will update to show that it is "Started" and then, right-click the server and select the (Liferay Portal > Open Portal Home) action.
 |
· 3. The eclipse browser should open to the portal home at http://localhost:8080
 |
· 1. Now that a SDK and portal server have been configured you can create a new Liferay plug-in project. Go to File > New Project... > Liferay > Liferay Plug-in Project
 |
· 2. In the Liferay Plugin project wizard page, select the SDK and Liferay runtime and then select the plug-in type (portlet is default) and now you can create a new plug-in project, by clicking Finish.
 |
· 3. If it worked you should see a new plugin project in the package explorer, so you are ready to begin Plugin Development.
 |
No comments:
Post a Comment